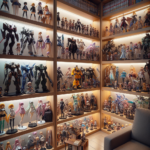
When you’re a collector of anime figures, the heartbreak of discovering a broken joint can be overwhelming. But don’t despair! With a little patience and the right approach, you can bring your treasured figures back to their former glory. In this guide, I’ll walk you through the process of repairing broken anime figure joints, ensuring that your figures are display-ready once again.
Key Takeaways
- Broken anime figure joints can often be repaired with basic tools and adhesives.
- Proper diagnosis and assessment of the damage are crucial before attempting repairs.
- Using a pin vice, wire, and strong adhesive are key components of the repair process.
- Allowing adequate curing time for adhesives is essential for a strong bond.
- Preventative measures can help avoid future breakage and maintain the integrity of your figures.
Diagnosing Joint Issues in Anime Figures
Spotting the Signs of Breakage
The first step in any repair is to understand what you’re dealing with. Look closely at your figure and identify where the break has occurred. Is it a clean break or a fracture? Is the joint snapped or has it become loose? Knowing the type of break will help you choose the best repair method.
Assessing the Damage Level
Once you’ve identified the break, take a moment to assess the extent of the damage. If it’s a simple crack, you might be in luck – a little adhesive might be all you need. However, if the joint is shattered or missing pieces, the repair will be more complex. Don’t worry, though; even the most daunting breaks can be fixed with a bit of ingenuity.
Tools You’ll Need for the Task
Gathering Your Repair Kit
To fix your anime figure’s broken joint, you’ll need to assemble a few tools. Here’s a list of what you should have on hand:
- A pin vice or a small hand drill
- Thin wire or a paperclip for creating a new joint pin
- Super glue or a specialized plastic adhesive
- Needle-nose pliers
- Fine sandpaper
Understanding Each Tool’s Purpose
Each tool in your repair kit serves a specific purpose. The pin vice will be used to drill precise holes for the new joint pin. The wire or paperclip will act as the replacement pin. Adhesive will secure everything in place, while pliers and sandpaper will help you shape and smooth the repaired area for a seamless finish.
Step-by-Step Repair Guide
Initial Preparations
Before you start the actual repair, it’s important to prepare your workspace. Make sure it’s well-lit and free of clutter. Lay out all your tools within easy reach, and if possible, work on a surface that’s easy to clean in case of any adhesive spills.
Removing Broken Pieces Safely
Carefully remove any loose or broken pieces from the joint. If the break is clean, keep the pieces together to help guide you in aligning them during the repair. If the joint is shattered, collect all the fragments – even the tiny ones could be crucial for a successful repair.
Example: If the arm of your Nendoroid figure has snapped at the elbow joint, gently pull apart the pieces. If they don’t come apart easily, you may need to use your pliers to carefully extract them without causing further damage.
j1. Correctly Drilling for Metal Pins
Now that you’ve got a clean slate to work with, it’s time to drill. Secure the larger piece of the broken joint in a vise or hold it firmly with your hand. Take your pin vice and select a drill bit that matches the diameter of your wire or paperclip. Carefully drill a hole into the center of the broken joint, going deep enough to allow the wire to sit stably but not so deep that you risk damaging the figure further.
j2. Securing Joints with Adhesives
With your holes drilled, cut a piece of wire to the appropriate length. This will serve as the new pin for the joint. Dip the end of the wire in your adhesive and insert it into the hole you’ve drilled in the larger piece. Next, apply adhesive to the other end of the wire and the corresponding hole in the smaller piece of the joint. Carefully align the pieces and press them together. Wipe away any excess glue immediately, as it can be difficult to remove once it’s dried.
j3. Allow Adequate Curing Time
Patience is key at this stage. The adhesive needs time to cure and form a strong bond. Check the drying time on your adhesive’s packaging and give it at least that long, if not a bit more, to ensure a solid repair. During this time, don’t move the figure or test the joint, as this could weaken the bond you’ve just created.
When Repairs Get Complicated
Facing Challenges with Painted Joints
Painted joints add another layer of complexity to repairs. If the paint has chipped off during the break, you’ll need to touch it up after the joint is fixed. Use acrylic paint that matches the figure’s original color. Apply it with a fine brush, and be prepared to add multiple thin layers to achieve the right shade and finish.
Dealing with Small or Delicate Parts
Some figures have particularly small or delicate parts that can be tricky to repair. For these, you may need to use tweezers to handle the pieces. If the joint is too small to drill, consider using a strong adhesive alone, carefully applying it with a toothpick or a fine-tipped applicator to ensure precision.
Troubleshooting Common Repair Mistakes
Identifying and Correcting Issues
If your repair isn’t holding, assess what might have gone wrong. Was the adhesive not strong enough? Did the pieces not align correctly? Sometimes, it’s as simple as removing the adhesive with a solvent and trying again. Other times, you may need to reconsider your approach entirely.
Preventing Future Breakage
Once your figure is repaired, you’ll want to keep it in top shape. To prevent future breakage:
- Handle your figures with care, especially when articulating their joints.
- Display your figures in a stable environment, away from direct sunlight and extreme temperatures.
- Consider using a clear protective coating on joints to reinforce them without affecting their appearance.
Remember, the goal is not just to repair the break but to reinforce the joint to prevent a repeat incident.
Advanced Techniques for Seasoned Collectors
For those who are comfortable with more complex repairs, consider creating a custom mold of the broken joint using a silicone putty. Once cured, this mold can be filled with a resin to cast a new, durable joint that matches the original exactly.
With these practical repairs, your anime figures can be as good as new. Keep in mind that every figure is unique, and some may require a tailored approach. But with a steady hand and a bit of creativity, there’s no break you can’t fix. Happy repairing!
Customizing Joint Strength
For those who are adept at figure repairs, customizing the strength of the joint can be a game-changer. This involves not just fixing the joint but reinforcing it to prevent future issues. You might consider using a metal pin that’s slightly thicker than the original, or even reinforcing the joint with a surrounding sleeve of heat-shrink tubing, which can provide extra stability without impeding the joint’s movement.
Restore Articulation without Compromise
Restoring articulation is essential. It’s not just about making the figure whole again, but ensuring it can be posed and displayed as intended. When repairing a joint, make sure that the repair doesn’t hinder the figure’s movement. This might mean taking extra care to ensure no excess glue impedes the joint or using materials that maintain the joint’s flexibility.
FAQ
Got questions? You’re not alone. Here are some of the most common queries when it comes to repairing anime figure joints, along with straightforward answers to get you back to repairing with confidence.
- Can I prevent my anime figure’s joints from breaking? Regular maintenance and careful handling can reduce the risk, but accidents happen. Keep joints clean and free of dust, and don’t force movement if a joint seems stuck.
- What is the best adhesive for repairing broken anime figures? A high-quality cyanoacrylate (super glue) is often the best choice for its strong bond and quick drying time. Look for one that’s specifically designed for plastics.
- How long should I wait for the glue to dry? This can vary by product, but a safe bet is to allow at least 24 hours for full curing. Check the product’s instructions for the best results.
- Is it better to replace a broken joint or repair it? If a replacement is readily available and matches perfectly, it might be easier to replace it. However, repairing can be more cost-effective and is often the only option for rare or older figures.
- Can heat or cold treatments help fix a warped figure? Yes, in some cases. Heat can make plastic more pliable for reshaping, while cold can help set a new position. Always be cautious and use these methods sparingly to avoid further damage.
Can I prevent my anime figure’s joints from breaking?
Maintenance is key. Regularly check the joints for tightness and clean them to prevent the buildup of grime that can cause stiffness and stress. If a joint seems stuck, apply a gentle heat source, like warm water or a hairdryer on a low setting, to loosen it up. Remember, prevention is always better than cure.
What is the best adhesive for repairing broken anime figures?
Super glue is often the go-to adhesive for its strong, quick-drying properties. Look for a variant that is designed for use with plastic materials. Some collectors swear by two-part epoxies for a more durable bond, especially on load-bearing joints. Always follow the instructions for the best results.
How long should I wait for the glue to dry?
Patience is a virtue, especially when it comes to adhesives. While super glue sets quickly, achieving maximum strength usually takes longer. Waiting 24 hours before handling the repaired figure ensures the bond is as strong as possible. Rushing this process can lead to weak joints that may break again under less stress than before.
Is it better to replace a broken joint or repair it?
It depends on the availability of a suitable replacement and the rarity of the figure. If a perfect match is available, replacing the joint might be the best option. However, for unique or discontinued figures, a careful repair might be the only way to restore the figure to its former condition.
Can heat or cold treatments help fix a warped figure?
Yes, they can. Applying gentle heat can make the plastic more pliable, allowing you to carefully reshape a warped part. Once you have it in the desired position, using cold can help set it. But be cautious: too much heat can damage the paint or the plastic, and too much cold can make it brittle.